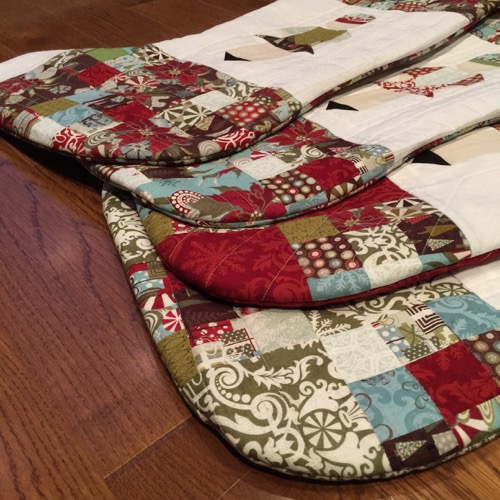
FYI......... I have read cautionary tales online about the use of these cozies in your microwave....cotton only is to be used...cotton batting no scrim or glues, cotton fabric and cotton thread....or you could have a fire in your microwave.
We never put ours in our microwave, because I tend to use leftover batting and I do have polyester thread sometimes, so we just heat up whatever we are eating and slide the bowl into the cozy after microwaving. Also good to use when having ice-cream too, to keep you from melting the ice cream with your hand warmth, just a thought.
Bowl Cozy with Corner Handles
I am going to just run through the process and add a PDF sheet you can download at the end with just the sewing instructions on it for ease of use with the pictures provided in the tutorial itself.
Measure your bowl to determine the size your square of fabric will be. My bowl measured 10" so I will be cutting (2)10" squares of cotton fabric and (2) 10" squares of cotton batting
Large Corelle round cereal/soup bowl
I made a paper 10" square and drew the diagonal stitch lines (dash lines) and the dart lines (solid lines) I centred my bowl base and traced around with the pen resting on the wider part of the bowl shape. This will give you the approximate length of your dart. Mine is 2.5"
To figure out the width of your dart, which determines the top opening I suggest pinning your darts and testing with your bowl shape. My bowl has fairly straight sides, a tapered bowl may require less width at the top of the dart.
I started with 1/2" darts but found this was to open for my bowl
Left 1/2" dart to big and opening....right with an inch dart, the bowl fits in securely!!
I folded my fabric squares in half and then in half again and then fold the square into a triangle
pressing with my iron after each fold to achieve my sewing and dart lines. You can then use those lines to add chalk lines if you have trouble seeing the folds.
Pin (I just used my straight pins) one of your squares of fabric to a batting square and stitch all your fold lines.
I know most of the patterns out there say to sew an x (diagonal lines) but I sew on all the lines to add more quilting and to keep the batting secure.
You are going to add 4 darts, one on each side of your square
Measure down for your length and out from the dart line for width. Remember you will be sewing with the fabric folded so my 1" dart is actually 2" at the top. (one inch on either side of the dart line)
Fold your square in half and sew along your dart line (don't forget to backstitch)
This is what you will end up with when all four darts are sewn>
Trim off the excess
Repeat steps with your second fabric and batting squares and pin them right sides together matching darts and points.
Leave a small section for turning right sides out.
Before turning trim corners....if your sewing machine doesn't like bulk when top stitching you make want to trim out some of the seam batting....my Janome doesn't seem to mind, and again I like to know that the batting will stay secure as I know these will be washed a lot.
Turn right side out, press the opening area to keep the seam fabric inside
Top stitch around the edge as close as you can to the edge, making sure you catch the opening seams to securely close it.
For Small Bowl (with handles)
Cut (2) 8" squares cotton fabric
(2) 8" squares cotton batting
Darts are: 1" x 2" long
Bowl Cozy (no handles)
This version is basically the same with 1 change....
The darts or boxing is done on the diagonal lines
I used the small Corelle round bowl, which measured 8"
Cut (2) 8" squares of Cotton fabric and (2) 8" squares of cotton batting
Build your 2 sections same as for the about, but when you add the darts fold on the diagonal lines and measure from the tip....again for finding your right dart measurements pin the 4 darts and test your bowl. Once you find the right combination you will be flying.
This worked boxing off 2" but it left the bottom with a square shape....which isn't an issue and it is very secure, but I will try it with a more tapered shape and update you!!!
Continue as in the original instructions
I think we have all decided that we like the handles, but this one is still great, it also would make a great key or change catch all on a table or dresser.....
Enjoy