Friday, June 10, 2016

Cross My Heart in Garden Gate....with a Fantastic Give Away....

I just can't express how much joy making this quilt has given me...I am in love with this fabric line and keep gushing about it, but I just can't seem to stop myself.....

I'm not sure if the floral prints are triggering a memory of my Great Grandmother's English garden.....
or the first set of pretty floral sheets I had on my bed as a kid....
or is it the gorgeous teals, pinks, peaches and greens....
or the secondary print of dots and petals.....
or maybe the birds and birdcages which remind me of my other grandmother's Budgy...

I can't put my finger on which of the memories, but maybe it's all of the memories, and really does it matter...this fabric just makes me happy!

Garden Gate

I knew from the start this line would work well with my "Cross My Heart" quilt pattern,
but I wanted changed it up a bit, so I decided to try the blocks on point.

The original pattern is set in a normal block formation, so I went back to EQ7 and did a little edit.

While I'm not ready at this point to change the original pattern (because this is my first on point project, and I don't feel qualified) I will share  here how I tweaked my pattern.

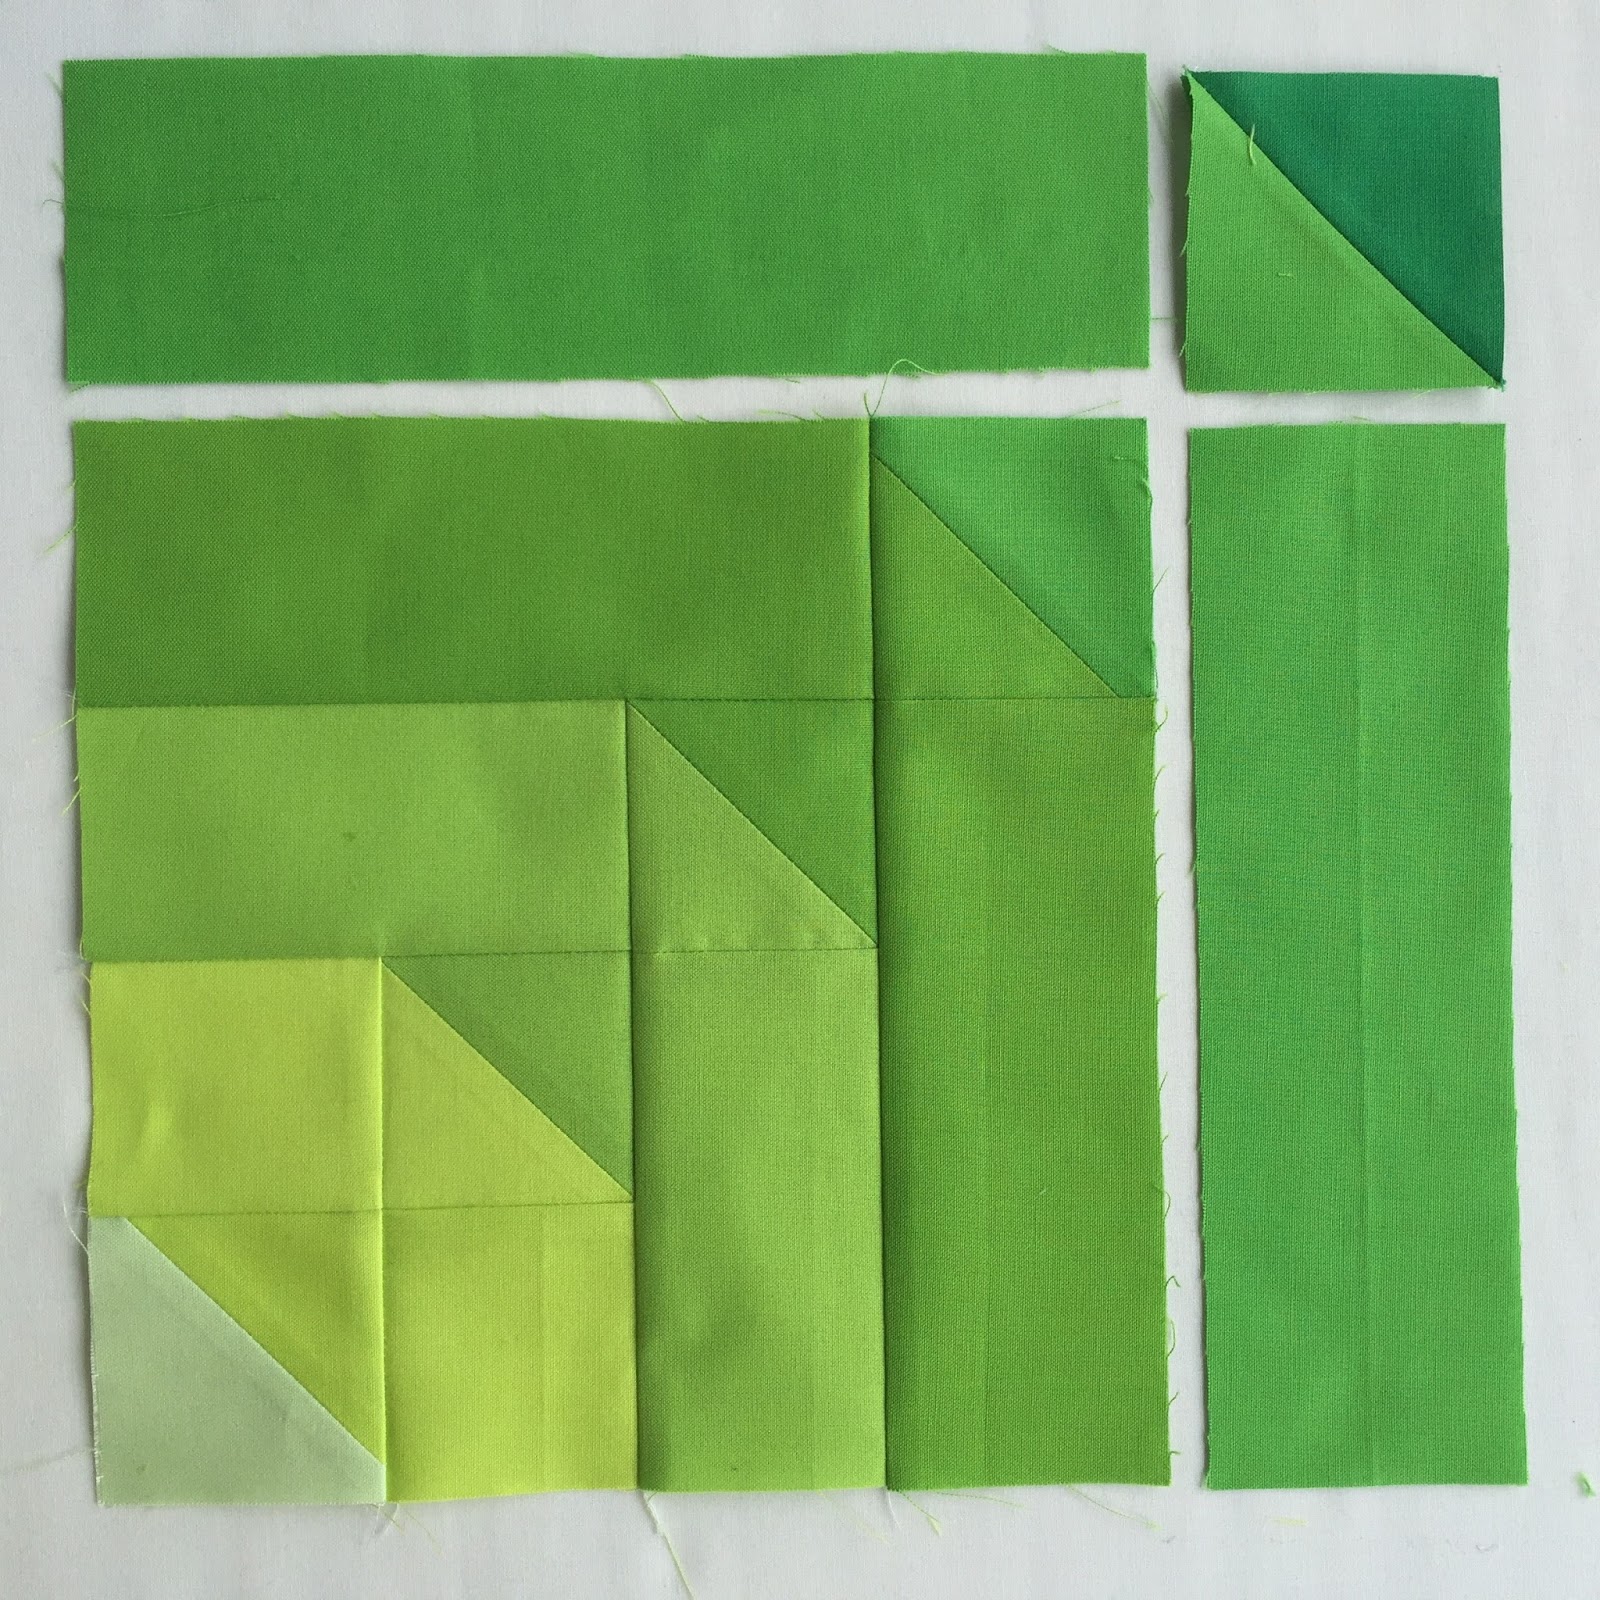
To achieve the on point affect requires two sizes of HST. The ones along the sides and across the top and bottom and the four corners. You can do a Google search and find charts to work with that give you your measurements for various sized blocks, these are the measurements I used for my 12.5" unfinished blocks.

(2) 9 3/8" squares


(3) 18 1/8" squares


A couple of tricks I used:

  • I put a pin in the edge I would be sewing to the blocks so I wouldn't get them mixed up (indicated by the green arrows)
  • I find the easiest way to line up the block and the HST/QST is to find the centres and match them, and pin from the centre out each way to the corners
  • Be careful as you will be working with a bias edge on the HST/QST, don't stretch.
  • Build your rows on the diagonal and add corners last


One other quick side note....I have started to add thicker bindings and I'm loving the look! This binding was cut at 4.5" width, and sewn with a 5/8" seam. (I've decided 4.25" works perfectly) Why? It started to give me more working space at the edge of my quilt for stopping my computerized pantos and not having to cut through the quilted stitches. I figured a 1/4" seam plus another 1/4" over gave me a 1/2" window to work with. What I didn't calculate was how much I would like the look. So this is a definite win, win!!
And it sews up just like the normal smaller version, I just measure 5/8" in from the end and mark it with a pin for the turning point!


Hope these quick little tips help, now on with the picture show
 and the fun announcement at the end
....don't miss it!


The fun announcement....
P&B Textiles is offering not 1 but 2 FQ Bundles of Garden Gate!!! 
So 2 lucky makers will get to create something lovely for free....everyone else start calling your local quilt shops and asking for this lovely fabric πŸ˜‰!! But before you do, put your ballets in the Rafflecopter giveaway and cross your fingers 
one bundle to be won here and the second bundle will be won on Instagram!
Oh yeah, and I thought it might be fun to add 2 PDF patterns of my Cross My Heart Quilt .

(A little shameless plugging here...all my PDF patterns 

That's it....good luck....

a Rafflecopter giveaway


Craftsy


SaveSave

Friday, June 3, 2016

One Block Wonders... for June...Topographical


I can hardly believe how excited I am to share this months block.....
 Why so excited? Because I almost deleted it from the One Block Wonder's  BOM list!!!

But......

I found the right combination, and all it took was some fabric inspiration....
enter our first sponsor this month


and our other Sponsors this month are....

Quality products, a great clearance section, monthly deals, and excellent customer service


And

find all the zippers you'll every need in a rainbow of colours......not to mention cute zipper pulls...


Now On to our Block....
I'm behind on getting the full patterns written up and posted on my Craftsy Pattern Page. I'll update this post as soon as I do.


Just like that your block is complete...so what are you going to make with yours??? And what will multiples look like you might be asking......

Here's the Mini


and here's my Topographical Quilt so far


I just need to add borders and get this beauty on the long arm!!


That's it, your turn....can't wait to see what you make!

As always the block pattern stays up free for the month,
if you want to join our FB group you can link to it here

and our #OneBlockWondersBOM
#OneBlockWonders2015
and #TopographicalQuilt


SaveSave

Sunday, May 29, 2016

SunBurst Granny Square Blanket

I've seen these lovely Granny Square blocks in IG posts and haven't really taken the time to investigate...but all of a sudden I needed a new evening project, and a break from my English Paper Piecing ongoing two year heirloom project.....I know I'm really just procrastinating again...but I really need to switch up my evening projects so I don't get bored not to mention throw in the towel on the hand sewing! πŸ™„

I'm making lots of white hexies for sides and top/bottom, and sashing for each triple diamond
3/4" hexies fit perfectly in the embroidery floss storage containers!


Anyway, I looked up Granny Squares hoping to find these fun blocks and yeah for Google, this is what I found out...the block is called a SunBurst Granny Square and there are lots of free patterns and tutorials out there!!


I had a few (5 to be exact) Bernat Cotton large balls left from when I was crocheting Ponchos, and being as its finally turned hot around here, cotton seemed the smart choice!! It won't be as scrappy as some of the blankets I've seen online but, with a variegated yarn and 3 solid colours, I think it is going to be gorgeous.


I started with this tutorial from Nittybits, but I learn new stitches better with a visual, so I found a four part YouTube video too from Bella Coco.


I had 3 blocks completed and was using the  join as you go method to finish the blocks, when I stumbled upon  a continuous join as you go sheet and tutorial. Well, I'm always up for a new challenge and learning experience and it just makes sense to have less joins and ends to weave in. With 4 rounds per block of ends to weave in already, I'm all for cutting out anymore.


So I pulled out the yarn from the 3 blocks I had already joined together and got thinking that maybe I wanted my blocks to be a little bigger anyway...so I'm adding the squaring round now instead of using it for the joining round!!

Now I have the continuous joining layout sheet (follow the link) and the 3 part YouTube tutorial is found in the same link.

I will still be using the green to join and would have started but I need to buy more yarn and didn't mix my yarns up enough for my liking so will start joining after I have crocheted a few more.
Hope this gives anyone thinking of trying theses lovely little blocks the info and inspiration they need to give it a go!!


Will post more pictures as the blanket grows...as it turns out these colours will go perfectly in my little grand baby's room, arriving in October and already getting spoiled.....lol! This baby will have no shortage of blankets and quilts to cuddle with, not to mention, baskets, bags or anything else I know how to lovingly create for this little treasure!!

Have a great week everyone and 
Happy Memorial weekend to all celebrating !!


Friday, May 27, 2016

One Block Wonders BOM........May Blooms Link Up

One Block Wonders BOM 
May Blooms Quilt block was sponsored by 


and I used these fantastic shades from the Cottom Supreme Solids line.....


and the result was this lovely version of my May Blooms Quilt pattern....


 I love how the blocks came together to form these lovely flower blocks, but I wanted to add some length, so I came up with the idea to add some text to one of the borders...


and what else do you add to a May Blooms Quilt then April Showers....bring May flower
Just Perfect!


I don't always know when I start a quilt project who I'm making it for, 
but usually somewhere along the building journey it all becomes very clear....
and I knew part way through that I was making this one 
for my wonderful Mother-in-law! I was able to gift it to her on Mother's Day, and she loved it!! 


So I've shared my version of the block in a few posts now.....

Now it's your turn to share ...

Remember you only need to have sewn one block to link up and qualify
 for this months prize draw, of a FQ bundle, donated by RJR Fabrics
here's another link to this month's pattern...you still have time to make a block and link up....
The Link up will run from May 27 until midnight on June 2

Can't wait to see your block(s)/project!


Our Winner is.....
Sharon