Showing posts with label crochet. Show all posts

Saturday, July 16, 2016

Re-Post and Finish for the Garden Gate Crocheted Quilt

There have been so many wonderful compliments and questions about this project that I thought I would update the original post and share my finish here at the same time!!

You can't go wrong when you start with this awesome fabric....

Garden Gate from P&B Textiles


 Well I had some extra bits left over and you know how much I love this line....so none can be left unused....


 I stumbled across this lovely idea over on Fanny Lu Designs and just knew it was what I needed to do with the extra bits! This is going to be amazing! 
I mean what can be better then combining two creative loves into one project....When crocheting meets fabric....yes please!!

Check this out....and check out the tutorial Tiffany has made...including YouTube videos, for us very visual learners!!

 Isn't this lovely!! 
I can't wait to see my blocks come together!! 


 The yarn I chose and I hope it will work....though I may have to change it, because I just realized this yarn is thicker then what is called for in the instructions....so it maybe too thick to sew with??
Updates to follow on this one for sure!!

UpDate:

What I learned....
1.) Pick a needle that is sharp and the eye is relative to the thickness of your yarn. I chose a yarn that was a #3 weight, when the pattern called for #1 weight (thinner). So I actually changed from this needle to a larger one. By the end of this blanket my thumb felt like it had a bruise, from pulling the yarn, so I will make sure if I make another one that I try to find the thinner yarn.

2.) I made my blocks larger, as I said, and when I made my stitch guide I wasn't thinking about making sure I had the same amount of stitches per block side...silly girl....so when you make your 1/4" stitch guide, make sure you just add the tick you need between your top stitch lines. 


3.) Look at the back to make sure you are pulling your needle through at the same depth each stitch! I used the topstitch line as my guide, front and back.


4.)By making my blocks larger I basically went rogue....so the crochet pattern also needed adjusting....but because I wanted to crochet (join as you go) I ended up just doing the shell stitch around my blocks with a single crochet in between......


The little shoes are a free pattern I found on line here on the Michael Miller website, and a great way to use up the smaller leftovers from this project!!
What I didn't like about this pattern and maybe it doesn't matter...it leaves a seam on the inside of the shoe...next time I am going to try putting the shoe together differently so that the seam ends up inside the sole....wish me luck. I'll let you know if it works!!


That's it for now....
if you came over just to check out this post, take a moment and read the post previous to this one....it has a great ending!! 😉


Tuesday, December 8, 2015

Crochet Baskets

I found this fun pattern online a while ago when I was wanting to make some fun and useful handmade gifts. I ended up making baskets for an online friend, a baby shower gift, a Christmas present and one for my own bathroom.
I've been on a mission to use up my yarn stash and came to some chunky yarn...so my thoughts went back to the baskets.....so I'm making more and thought (and some of you asked) I would share the link with all of you! Also now I won't have to go hunting for it again...lol

Chunky Crocheted  Baskets
(I'm crocheting using 2 strands of chunky yarn and a 7mm hook, though the pattern calls for an 8mm)

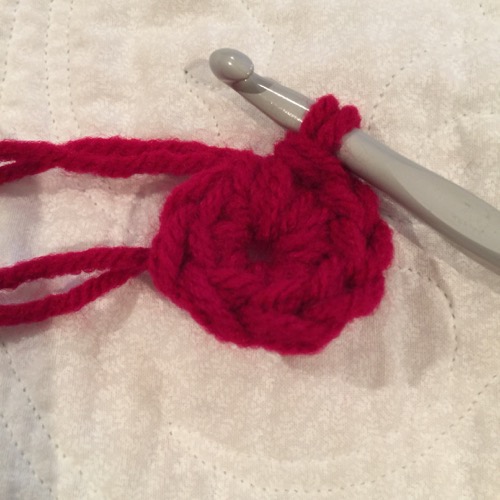
Make your normal loop and chain 2


This is maybe the trickiest...getting the 8 sc into the 2nd chain from the top or you first chain stitch.

 it's tight but doable.....

 I slip to join the round, then chain 2


  Then you follow the directions, but you can totally choose what size you want your basket to be, by adding rounds to the base before you start on the sides. Or do less rounds to make an even smaller basket. Also choose how tall you want, by adjusting how many rounds you do. That way you can have as many nesting baskets as you want.


 (hdc and then chain missing stitches and continuing to hdc on the other side produces a handle. If you adjust the pattern just remember to adjust the placement of your handles so they will line up with each other, on either side of the basket.)


 Next round you sc around the chain stitches to add cushion and thickness to the handle area


 I won some labels from All This Wood and am loving adding them to my handmade items!! Such a nice finish....


That's it, enjoy making some of your own....but don't be surprised if you thumb hurts a bit....lol.....its worth it though :)


Sunday, October 18, 2015

Clay Post Crocheted Afghan

I am so sorry it has taken me this long to get the information together and post about it. I have been busy with the One Block Wonders BOM and just kept forgetting. Better late than never... ;)


When I finished this afghan a few weeks ago,  I was so thrilled to hear by your feedback, that you loved how this turned out as much as I did. I certainly will be using this stitch again and making another afghan sometime soon, so for you and me to reference, I thought I would share some tips...

Pattern can be found here in my Craftsy Pattern Shop:

Clay Post Afghan

Approximately 46"L x 65"W
(3) Bernat Worsted 14oz (400gr) balls (Clay)
(2) Bernat Super Value 7oz (197gr) (Natural)
Size 5mm crochet hook (US 8)

ch: chain
dc: double crochet
sc: single crochet
fpdc: front post double crochet (dc done around a dc post from a previous row)


Row 3 explained:


 Basically you dc every other sc and FPdc every other dc from the previous row.
The 5th row you start with ch 3 skip first sc and dc in next sc, this will give a staggered or diagonal affect to the pattern.

Hope this all makes sense. Let me know if you are confused.
It's hard to crochet and take pictures or video of yourself....

*