
Todays post is sponsored by ZipIt Zippers.....
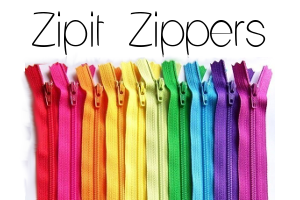
And we all love Jennie's zippers.....don't we...

I was lucky enough to got my hands on some of these cute buttons,
because they haven't all been listed yet....
because they haven't all been listed yet....
and wanted to come up with a few quick and easy projects to showcase them in .....


As most of you will know, we are all pretty excited around here
waiting for our first granddaughter's arrival to happen in late October.....
waiting for our first granddaughter's arrival to happen in late October.....
So of course I had to find a project that would be suited for a little girl....
(1) Hair Ribbons


I found out that making bows is not exactly in my skill set, lol....
But I love how these turned out anyway....
I will not even attempt to do a tutorial for this, I was all thumbs.
The basics: make your favourite type of bow, I added some tact stitches as I built my bows, and then add the button at the end and sewed on a hair elastic.

(2) How about some cute zipper pulls...
All you need for these is some ribbon, small swivel claw hooks and your favourite Zipit button!

Loop the ribbon through and sew on your button to join and close the loop, easy...peasy!!!

And I mean how cute is it to have the fun eye glasses button on your sunglasses/eye glasses case!!!
(3) Book Marks
Now I know this is a bit "Old School" with ebook and tablets....
but there is nothing better than curling up with a good book...
or looking through your favourite quilt book for inspiration or to start a new project....
And these would make great teacher gifts....

I made these two different ways, with the same basic supplies.
I uses an ivory eyelet lace and weaved 1/4" ribbon through it.
For the 1/4 ribbon that were woven and the pattern was on both sides.....

I just folded the ends over twice and top stitched to make a finished hem! Then added the button near the top of the bookmark. this makes a nice simple thin bookmark.

For the printed ribbon, which only had the dots on one side, I made two identical eyelet pieces

When I got to the end I folded the last two eyelets to match and threaded the ribbon through.

Leaving a ribbon tail at the top...


I have to say this turned out to be my favourite. It's more finished and has more body to it!


(4) Cup Cozy
I carry one of these in my purse all the time! I love a hot drink but not the hot cup....
and I love that these add fun to my cup as well as reduce some of the environmental foot print I leave...
I have a free template over in my Craftsy Pattern Shop, if you want to make one or ten!


Couldn't resist adding the cat button to the bird print.....lol, especially with the wink....


If you are a tea drinker, maybe you want to add a pocket...... I cut (1) 3.25" x 5" rectangle. Folded it in half and sew down the sides and across the bottom, leaving an opening for turning, with a 1/4" seam. Press and topstitch to the quilted top about an 1.25" from the raw edge.


Well I hope this post has inspired your creativity.....
I can't wait to see how you use your buttons....
Thanks again to Jennie from

Don't forget... you can use the discount code
"upstairshobbyroom"
for any of your purchases from Zipit....
and you will save 15% off your purchase!!!


