
I can't believe I am posting a sewing tutorial that involves sewing clothing....
I am not much of a seamstress (lol, who am I kidding....I'm not a seamstress at all), so if I can do this, I know you can too!!!
Over Christmas I was recovering from a flu bug and got it in my head
that I needed flannel Pj bottoms.
Now, I know I wasn't in my right mind, because if I was I would have reminded myself of all the failed clothing attempts I have had. So it's a good thing I wasn't thinking clearly
and just Googled anyway, lol!
What I found gave me the start I needed, but I didn't quite agree with everything I read, so I tweaked and the results......
A very shocked quilter, me, who not only created a pattern, but a pattern that worked!
And Pj bottoms that fit and look great....


So what did I do to celebrate....besides wearing them right away....and all the time...
don't judge me, lol
I found a baby pattern online and made a pair for Ava for Christmas....👍🏻
Technically, two pairs, because the first pair was way to big....so I tweaked that pattern too, using a pair of Ava's pants.

This went so well I thought I had better make another pair! And that went so well, again, I figured I better write up a tutorial to share.... and honestly when it's been awhile between making a project, I'll come back to my own tutorials for a refresher.....so this is for my benefit too. 😉
Then, I reached out to some of my blog sponsors... to help you out with a sale, incase you want to try this tutorial for yourself....
and


both came on board to help sponsor this project tutorial.
Here in Canada it gets pretty cold over the winters and flannel is just the thing to keep you toasty warm, but some may not want such a warm fabric.....so this tutorial is done using a brushed cotton, a lighter weight fabric, still with that soft feel, it's a great option for mid-winter into spring alternative and for those of you who maybe warmer blooded than I am .....
You could also use cotton for a great summer version.


Then fold your pants as below and repeat to get your front pattern. Just tuck that back piece down when you get to the waistband section if your pants do this too.
 This is what my roll of newsprint looks like:


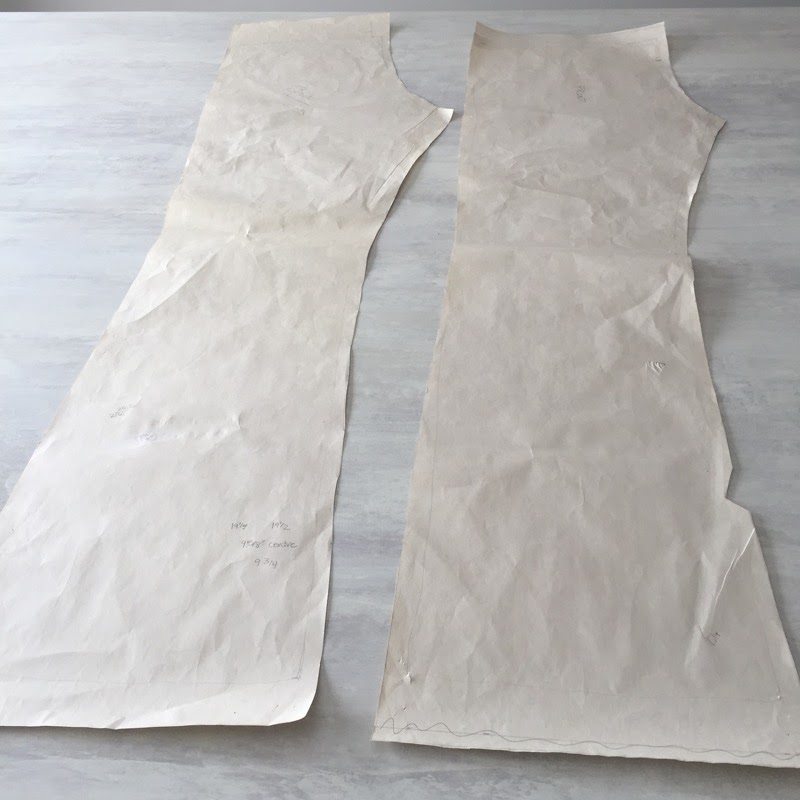
Once you have traced both front and back pattern pieces, and labeled them front and back, take your ruler and add 1/2" for your side/crotch seams and 1.5" for the waistband casing and about an 1" for your hem. Using your paper scissors cut out your two pattern pieces.


I took two bright post-it notes and pinned them to my 2 front pattern pieces, so I wouldn't lose track of which piece was which. You can use a disappearing marking pen and write on the back of the pieces, if you prefer.

Over Christmas I was recovering from a flu bug and got it in my head
that I needed flannel Pj bottoms.
Now, I know I wasn't in my right mind, because if I was I would have reminded myself of all the failed clothing attempts I have had. So it's a good thing I wasn't thinking clearly
and just Googled anyway, lol!
What I found gave me the start I needed, but I didn't quite agree with everything I read, so I tweaked and the results......
A very shocked quilter, me, who not only created a pattern, but a pattern that worked!
And Pj bottoms that fit and look great....


So what did I do to celebrate....besides wearing them right away....and all the time...
don't judge me, lol
I found a baby pattern online and made a pair for Ava for Christmas....👍🏻
Technically, two pairs, because the first pair was way to big....so I tweaked that pattern too, using a pair of Ava's pants.

This went so well I thought I had better make another pair! And that went so well, again, I figured I better write up a tutorial to share.... and honestly when it's been awhile between making a project, I'll come back to my own tutorials for a refresher.....so this is for my benefit too. 😉
Then, I reached out to some of my blog sponsors... to help you out with a sale, incase you want to try this tutorial for yourself....
and
And
Here in Canada it gets pretty cold over the winters and flannel is just the thing to keep you toasty warm, but some may not want such a warm fabric.....so this tutorial is done using a brushed cotton, a lighter weight fabric, still with that soft feel, it's a great option for mid-winter into spring alternative and for those of you who maybe warmer blooded than I am .....
You could also use cotton for a great summer version.
Pj Bottom Tutorial
Tips:
- There is a long running debate in quilting about pre-washing your fabrics or not....there is no debate when you are sewing cloths.....PRE-WASH your fabrics!!!! and dryer them! You do not want to go to all the trouble of making a pair of pants that shrink after you wash them....even if you are like me and hang your cloths to dry, PRE-WASH and dry.
- Press the fabric after pre-washing and drying to have a flat surface to lay your pattern on and cut accurately.
- Choose a pair of pants that you love and are comfortable in to make your pattern from. I wanted a loose Pj bottom so I used a pair of jeans that were a size or so too big, but that I still love wearing. (it doesn't have to be jeans)
- Trace carefully. Make sure you line up the seams and have the pants hand pressed out flat so you are tracing an accurate size.
- I used an end roll of newsprint that I got from a local newpaper to trace my pattern out on. Some craft stores now sell rolls of paper too. I like the newsprint paper because it is a bit thinner than regular paper. You can also buy pattern paper at some sewing centres.
- The amount of fabric you will need will depend on two things. You leg pattern length and the width of the fabric you buy. I used about 3 yds. I'm 5" 10" and laid my pattern pieces end to end, because my fabric was not wide enough to have them side by side.
- If you own a serger you will serge all your seams, sewing and finishing your seams in one step, but if you don't you will want to finish your seams with either a zigzag stitch or I rolled each side of the seam allowance under and topstitched to completely encase, and add a stitch feature to all the seams. (*You'll see more in the tutorial pics)
- You will want to backstitch at the beginning and ending of all your seams.
- (EDIT) I sewed my seams at 3/8" not 1/2"....I wanted to make sure I had a comfortably loose pant and I figured I would err on a little bigger than not loose enough.
- Abbreviations: RST- right sides together

Supplies:
Pair of pants to make your pattern
Pattern Paper
Pencil
Pins
Scissors (paper and fabric)
Ruler
Fabric (brushed cotton, flannel or even cotton)
3/4" waist band elastic (non rolling kind)
safety pin
safety pin
And of course your sewing machine and thread
Making you Pattern:
You are going to want to fold your pants to make a back pattern, like the picture below. Lining up your seams and smoothing the pants flat to get an accurate template to trace.

Then fold your pants as below and repeat to get your front pattern. Just tuck that back piece down when you get to the waistband section if your pants do this too.


Once you have traced both front and back pattern pieces, and labeled them front and back, take your ruler and add 1/2" for your side/crotch seams and 1.5" for the waistband casing and about an 1" for your hem. Using your paper scissors cut out your two pattern pieces.

Making Your Pj Pants:
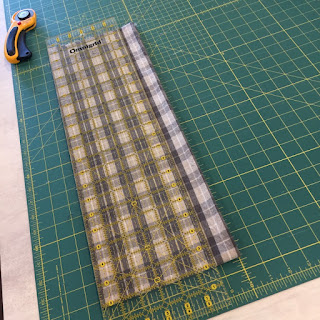
Lay your pattern pieces out on the pre-washed and pressed fabric, that is fold in half, staying as close to the selvage edge as you can. (That extra piece of brushed cotton on the fold side can be made into a narrower version an infinity scarf, tutorial found here, so practically no wasted fabric at all!!)
Pin in place and cut out your front and back pieces, with your fabric scissors. (you will now how 2 fronts and 2 backs)


I took two bright post-it notes and pinned them to my 2 front pattern pieces, so I wouldn't lose track of which piece was which. You can use a disappearing marking pen and write on the back of the pieces, if you prefer.

Sewing Steps:
- Lay a front and back RST and stitch the inner leg seam from hem to crotch (EDIT: as the tips said, I used a 3/8" seam). Repeat with the other front and back pieces. Press your seams open and finish the seam allowance as you wish.

- *Here is my seam allowance finish....takes more time and the last seam when the pants are together takes a little finesse, but so worth it for the finished look. (for me anyway) Roll the seam back and under and then topstitch close to the folded edge. Do this for both sides.


- Lay your two pieces RST matching the fronts and backs and lining up the inner leg seams. Pin in place and sew your crotch seam. Press your seams open and finish the seams.


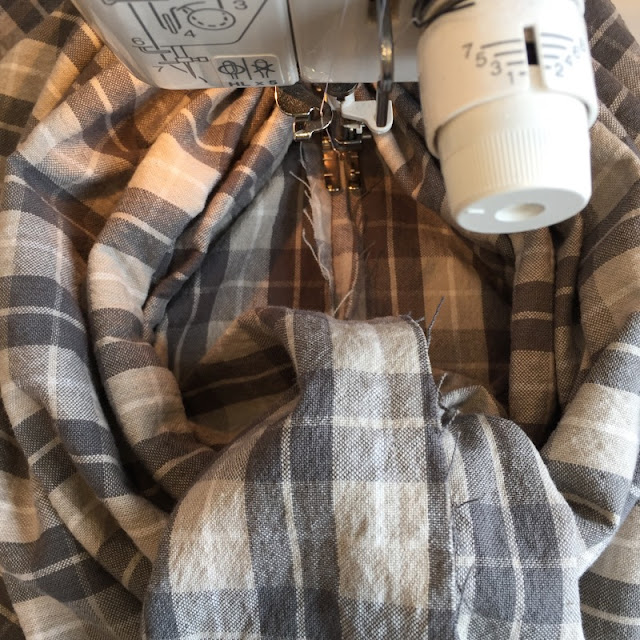
- With RST front to back, match the outer leg side seams and waist. Pin and sew outside leg seam. Finish the seams. This is the one that is tricky if you are rolling your seams, but it is totally doable. I've made 3 adult and a few infant sizes and I have finished all the seams this way.


*You will start at the waist band in the most open area of your pants, and work your way into the leg. Just take your time flattening out the fabric as it bunches up. Sew in small sections, this is a good time to have needle down in play on your machine if you have it.

- Making the Waist Band: Press under 1/4-3/8" all around the top edge of your pants, and then turn it down 1". Pin in place and topstitch close to folded edge leaving a 2" opening for threading the elastic into your pants. This is also a perfect time to add a label, if you own your own, or just a ribbon if you don't, to mark the back of your pants....so you don't try putting them on backwards all the time, lol!!


- Now take your 3/4" elastic and measure it around your waist to get a rough length of what you need, and cut. Using a safety pin thread your elastic through the waist band casing you just created. When you have threaded it through check that you haven't twisted the elastic and pin the two ends of the elastic together to hold in place, watching that it doesn't disappear into the opening. Try on your pants to get the accurate length of elastic you need. Re-pin and then stitch a box into the two pieces backstitching to make it strong and trim extra elastic away. Allow the elastic to disappear into the opening now and topstitch close.


- Hem: Try your pants on again to check for length, you shouldn't have a too much extra. I do a simple 1/4" fold and fold again.....but you can finish however you need to, to get the right length.


That's it....You have successfully completed your Pj Bottoms......I hope you love yours as much as I love mine...Can't wait to see what you make.Use #pjbottomstutorial and tag me in @upstairshobbyroom on IGOh and remember that extra strip of fabric I said you could make an infinity scarf.....Well I cleaned up the ends and trimmed the length straight and ended up with an approx. 15" wide by a little over 72" piece for my scarf....infinity scarf tutorial here

 is offering 10% off all Woven fabricsSaturday Feb 4 - Wednesday Feb 8th
 Is offering a 15% off coupon code on Flannel
Feb 4 - 11


