Showing posts with label wiggle me colourful. Show all posts

Monday, August 3, 2015

Wiggle Me Colourful Winners


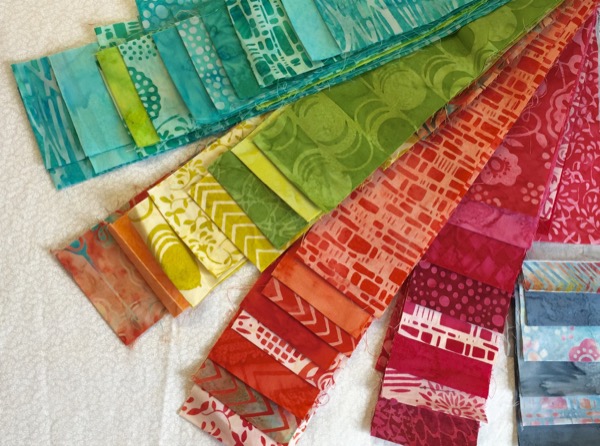
I have had the best time sharing my Wiggle Me Colourful quilt top pattern with all of you in the form of a sew along. Thanks to everyone who joined in on the fun, and all the sponsor who generously donated not only great prizes but helped me promote the sew along, thank you from the bottom of my heart!!


And here are the great sponsors, prizes and the winners!!!!


$25.00 Gift Certificate to

Susan Klein Lamelin

Cantik Batik Strip Pack

Cindy Ehni

Teachers Choice: Cantik Batik Strip Pack
Anga Christy 
(the border you added was amazing!! Great job!!)


$25.00 Gift Certificate

Jean McKinstry


$50.00 Gift Certificate

Marg Hanson
(I was so glad to draw your name for this prize...I think you blow everyone away with the speed in which you finished your quilt!! So pretty!! Enjoy)


We had many join our FaceBook Group...some start....but only five tops completed to date....so I am extremely happy I have five prizes to award....enjoy ladies!!! 

Keep posting your quilt tops finishes with the #wigglemecolourful #wigglemecolorful and tag me in too if you want at upstairshobbyroom

Happy Sewing Everyone!!


Wednesday, July 29, 2015

Wiggle Me Colourful

Just a reminder that Friday at Midnight Monday Aug 3 at 12pm EST (i'm fighting a bug and giving you some extra sewing time while I rest!!) is when the submissions for the sponsored prizes close. So if you are working on your #WiggleMeColourful quilt top don't forget to post a picture over on the FaceBook Group page (sign up required for that....but worth it) or use the #wigglemecolorful or wigglemecolourful on social media so I can find you that way.


Look at all the tops so far:
Marg

Susan

Anga

 Jean

 Cindy

Sponsor Sales Reminders:


use code "SAVE20" for savings store wide until Aug 1st!!!


*


*


July Stash Builder Save 10% on bundles or yardage of Sea Spectrum


Friday, July 17, 2015

#97 Week 3 Wiggle Me Colourful

Let the fun begin!! Time to start putting all of your hard prep work into making a pretty wiggle!!


First thing on the agenda today is to grab the colouring sheet that came with your pattern . It is going to be your construction chart, like the ones you get in some knitting patterns. This will be your row builder and row joiner chart of order.

...and now I am giving you permission to colour!! 

Yup, colour!! Grab you pencil crayons or go get your kids, this will be so much easier in colour...and not just any colour, but your fabric colours, or a simple version of them anyway.
I used the basic colour for each of my rows, and I left the background blank. You don't want to colour that in because it is a great place for further numbers and notes. I thought about adding some for you but decided that it was better for you each to add what you wanted to see on your own sheets.
So here we go. 


Once you are done colouring your sheet, lay out the background fabric strips next to your sewing machine in this sewing order:

Now following your chart you are going to sew your different strip sets and background strips together to form rows.  

Also when you are pressing your row seams you may want to add in your colouring sheets left border area a note as to which way your seams are being pressed. I also used different checks and highlighting as I constructed the top to keep things in order. Use the system that works the best for you. 

  • place your background strip and your first strip set together and sew your 1/4" seam. Now take the unsewn  end of the strip set and flip it is right side facing up and sew your next background strip to the end, and repeat with the background strip adding the next strip set and repeat with the strip set adding the last background piece and your first row is all together. 


Once all your rows are all together and your seams are all pressed you can again join your rows together following your chart. I love that each time the amount of seams to sew goes down by half...sets of 2, sets of 4.....


At this point I press my seams open when joining my rows, but again its your quilt and you have your  preferences, go with them!!
Once all your rows are joined together and all seams are pressed...admire your gorgeous wiggles!!! :)

But there is one more step: Adding your border

  • measure from top to bottom in 3 sections of your quilt. I usually go in about 3 inches from each side and the centre. Hopefully you find a consistent number,  that is what you will use to make the side border cuts with.
  • Whatever your length is make 2 and sew one to each side of your quilt
  • Now measure your quilt again from side to side, in the same way as before, for your top and bottom cuts. Use this number to make your remaining top and bottom borders with and sew them in place.


Your Wiggle Me Colourful Quilt top is now complete!!

I have to confess, eek, I have now made 2 tops and not finished either. (I am shopping for long arm quilting machine, but haven't decided or saved enough money at this point) so my stack of quilt tops keeps growing. So I can't say with certainty how accurate these measurements are,I used the Robert Kaufman quilter's app. I know the EQ7 fabric amounts were over generous and I tweaked them. 

So if you have your own system use that.


I hope you have enjoyed the sew along and that you are all in love with the quilt tops you have created!!
Next week will be having a show off your "wiggle" party on our FB page, that will run all week so you really have 2 weeks to get your "wiggles" together (and yes I chuckle every time I use wiggle this way, lol)

 You'll get all the info on that next week with the last blog post for the Wiggle Me Colourful Sew Along!! Thanks so much everyone for making this such a fun first experience with a sew along, though you have all !!

I can't wait to see what you all come up with!! don't forget to use #wigglemecolourful

Have a great week and happy sewing!!


Just for fun I made a very mini version of my pattern.....


UpStairsHobbyRoom

Friday, July 10, 2015

#96 Week 2 Wiggle Me Colourful Sew Along

I hope everyone enjoyed their holidays and found time to collect your fabrics!! 
This week is all about strip sets, cuts, sub-cuts!!


Week #2

Wiggle Me Colourful


  • Once you have your strips laid out the way you want, you need to sew them together in their groups.
  • Sew strips together along the longest side, sewing the first seam from top to bottom and the second seam from bottom to top. This trick should help stop the sets from bowing/warping, because of feed dog pulling(unless you have a machine with IDT, which should eliminate the need to rotate your seams), it feeds top and bottom evenly. 


 What you do when you want the window open and there is a nice breeze making ironing a little difficult....(use a fancy amethyst stone as a weight)


Trim edge....

Sub cut according to pattern directions...

Background cuts....


That's another week done!! 

If there are any questions or if I've missed something don't hesitate to voice them over on the 

See you all back here next week!! 
Have fun and I can't wait to see your pictures!! 

#wigglemecolourful

UpStairsHobbyRoom

Monday, June 29, 2015

#94 Week #1 Wiggle Me Colourful Sew Along

I am so excited to begin....
and so grateful for all the support I have been shown for the sew along. 
Don't forget you can join 
Also a great place for asking questions and showcasing your picture progress,
and because we have such generous sponsors, we will be having a finished quilt top link up/giveaway on the Facebook Group page at the end of the sew along.

As this is my first sew along, I would love to hear 
what you like and may need me to add or change to make it better for you.

Discount reminders: (just click on the logos to follow link to quilt shops)


Rita is also offering a 15% off code
 "WIGGLEME" 
 on any 2.5" pre-cut strips in store until July 13th.....
But wait
there will be a  Canada Day sale Wednesday July 1-4th
and you can save 20% off any item (excluding sale items) just use code "CANADA20"

(bad news....Rita can no longer get the Splash Bali Pop)


Pam is offering a 15% discount on jelly rolls until July 7th using code
"WIGGLE15"


And joining in on the fun....Tanya from is offering a 20% off storewide coupon with code
"SEWALONG20"


Calico Cat Fabrics is a cottage industry quilting supplies shop dedicated to quilters who seek only the best for their projects!! Let us do all the work seeking out your favorite prints and you get all the fun of creating your one of a kind pieces!!

We offer so many pre cut options..jelly roll fabric strips, charm packs, layer cakes, fat quarters and more!! We add new fabric collections all the time so be sure to stop by often and find the inspiration for your next project!!


Week 1

Wiggle Me Colourful 

Approximate size of top: 60" x 70"

Jelly Roll Friendly


or


 and this or yardage:


Here's some combinations I came up with using EQ7:


But don't be limited by my colour choices...
let your imaginations run and lets see what you can come up with!! 
Or just relax and follow along...it's your quilt, enjoy :)

That's it for this week! Super simple! Now if you are a go getter,  and have bought yardage for your background,  you will have figured out how to cut that up by the information above in the fabric requirements, lol, so have at it!!

See you back here in 2 weeks!! Lots of time to order fabric and relax and enjoy summer holidays, family, friends and some good food!!

Hope this isn't moving too slow, but it is summer.....summer is just slower, right?

Here's a button if you want to grab the code, and let's use #WiggleMeColourful for posting to social media!! Can't wait to see what you come up with!!

UpStairsHobbyRoom