
I've been making a number of pillows lately and I love the feeling of piecing
and finishing a project the same day! Well usually any ways.... and I'm calling mine mini quilts....
because let's face it, I've done the same work as if I was building a mini quilt, I just chose to turn this into a couch display instead of a wall display, lol!

This is my new block pattern L.O.V.E. and don't we all need more of that right now!
You can find it in my Craftsy Pattern Shop

Well after making these last two Valentine's Day themed pillow covers, I thought it was time to just post a tutorial, incase you wanted to see my steps, and also my own personal reference map. Sometimes when there is too much time in between even I forget what I have done too, so this is my version of writing things down!
Tips:
- If you plan on piecing and quilting a pillow cover, remember that during the quilting, your block will shrink, so add 1-2" to your block to account for that and give you room to trim your block back to square. So if your block is 18" and you want to make an 18" pillow, add a 1" border before quilting and trim to size after.
- I buy light coloured, cheap fabric to use for backings when quilting pillows. That way it doesn't add a lot of bulk and I don't feel bad that it is inside the pillow and no one ever sees it.
- I like a tight pillow so I cut mine to the size of the form, so 12" form I would cut my front and back to 12". An 18" form I would cut my pieces to 18", and so on. If you wanted a looser cover, just add 1/2" to your overall measurements. (my pillow preference is 18" and 20")
18" Pillow Cover with flap covered Zipper Back:
Pillow Front:
Make a pieced front that is at least 1-2" bigger than your end pillow size. Quilt as desired. Trim to size.
Pillow Front:
Make a pieced front that is at least 1-2" bigger than your end pillow size. Quilt as desired. Trim to size.
Pillow Back:
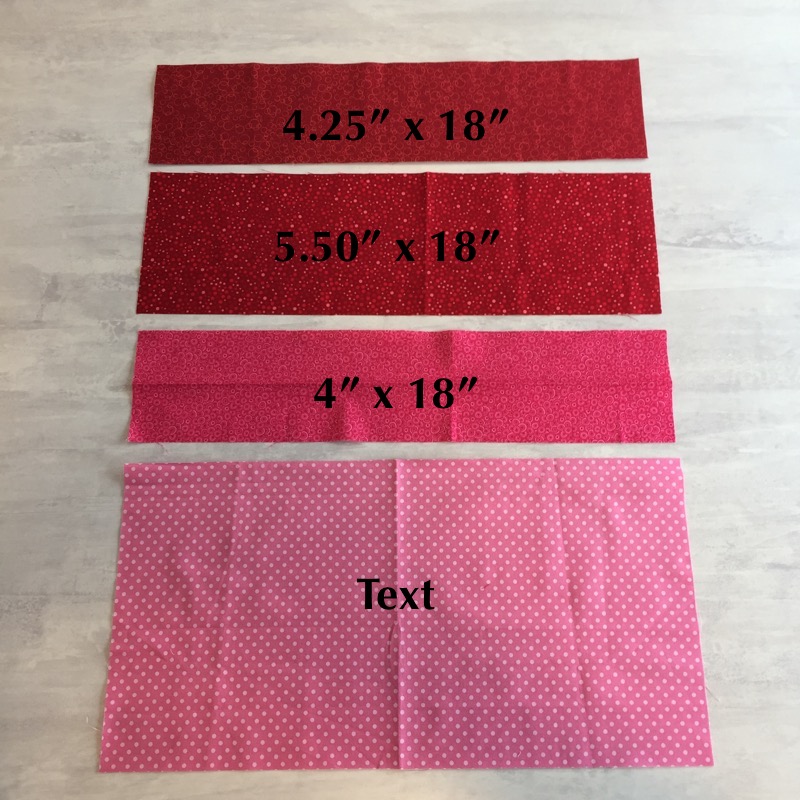
(2) 9.25" x 18" pieces of backing fabric
- I have also pieced the back, by sewing 4.25" x 18" and 5.50" x 18" pieces of fabric together to form the 9.25" x 18" or any combination to get the end size listed.
- And using this formula you can figure out any sized pillow back: The size of you are cutting your pillow (for me the size of the form) 18" divided by 2 plus 1/4" for the zipper seam. So (2) pieces 9.25" x 18" (pillow form again.)
(1) 4" x 18" piece of fabric for the zipper flap
(1) 20" zipper (I tend to use a larger zipper and cut off the excess. That way you avoid dealing with the metal ends.
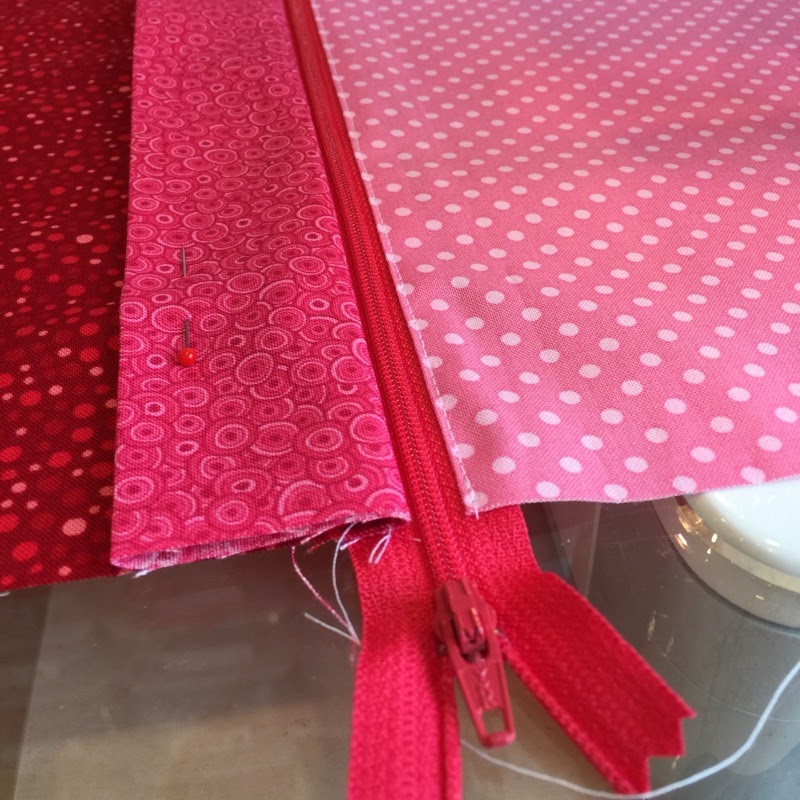
2) Place the zipper right side down on top of the flap, matching the edge of the zipper tap with the raw edge of the zipper. Put a couple of pins in to hold or base stitch in place. Zipper should extend passed the flap at both ends.

3) Now place the flap and zipper onto the bottom edge of your top 9.25" x 18" pieces, matching the raw 18" edge and sides, so the flap is centred. Add a few more pins and using your zipper foot and 1/4" seam, sew the one side of the zipper in place.


4) Press the fabric back and topstitch.


5) Pin the flap out of the way and lay it over onto the second piece of backing RST, again matching the zipper tap to the top raw edge of the bottom piece and matching your sides. Pin zipper in place and stitch 1/4" seam.


6) Again press the fabric back and topstitch. Remove the pins from the flap.
7) Lay your pillow front RST with the pillow back, making sure your flap is facing down and your pillow is right side up. Also make sure the zipper is partially open and inside the 1/4" stitch line. Pin together matching sides and corners and add a quilt label if you have one! Stitch around the entire pillow using a 1/4" seam allowance.


8) Trim the zipper ends of and trim the corners, close to but not throw the stitching, to remove some of the bulk.


9) Turn pillow right side out and press.

10) Add pillow form and enjoy your pillow or mini quilt!!!
I'm calling this new block pattern 4 Times the Love and it can also be found in my Craftsy Pattern Shop.


