Showing posts with label table topper. Show all posts

Thursday, January 21, 2016

Let's Celebrate....Table Topper or Wall Hanging

Building Joy 

or which ever season you are celebrating table runner or wall hanging!!!


Valentine's


 Spring/ Summer
Shown in Soft Dreams from P&B Textiles


The example is being made with Winter Wonderland by BunnyHill for Moda with Kona Lipstick and Snow for the front piecing. The applique and backing is Essentials by Wilmington Prints. 
The brick sections of this pattern will also work great with some leftover  jelly roll strips!!


Pattern can be found here.

The pattern has be revised and includes full instructions and reverse letter templates for the included appliqués...Joy, Noel, Be Mine and Hello Spring

But the fun part is you can appliqué anything you want into the middle section....just depends on what  you want to celebrate!!

I used Heat'n'Bond light for the applique and also added a lightweight interfacing to the back of my centre section to add some weight to the fabric for appliquing. So just trace the letters on the heat and bond and rough cut them and apply to back of fabric according to package directions. Then cut them out and apply to your centre section.


Check out Dafont.com if you are looking for some new font alternatives

There are lots of free fonts available, just know that you will have to play around to see how large to print them, each will be different!


I used a blanket stitch to overcast the raw edge. I set my stitch to 3.5 width and 2.5 length (Pfaff PassPort)


Joy Version


If you want the option of a wall hanging, just add folded squares of fabric to the top two corners during the binding process.


Hello Spring


Monday, June 8, 2015

#92 A Dresden Table Topper

Quick update for those of you who are interested in the Wiggle Me Colourful Sew Along....I have been working on the pattern this week and have it tweaked to work with a single jelly roll and background yardage for a completed quilt top. I have to laugh at myself, when I made the pattern I was just winging it and I guess I had more than one jelly roll open and laying around. Oops, and who knew (not me) that a jelly roll only has 40 strips and not 42, like the other precuts, lol. I really need to pay closer attention. Anyway all is fixed with the pattern and will be making the tutorial over the next few weeks!!! So excited to get this done and out to you all. Hang in I'm almost there.

Thought I would post some quick pictures of the Dresden Table Topper I just made for my Mothe-in-law's 75th birthday (today) party this Saturday!!  It turned out better than I had envisioned.


I used the 10 degree ruler, cutting 36 blades from 9 different fabrics.

Instead of appliquéing it to a block I decided to add backing and finish it with the points as part of the charm. 

 I layered the batting, then placed the backing fabric right side up and the dresden right side down, pin in place. Sew 1/4" all around the outside edge.


Trimmed away the extra

Clipped the inside corners and trimmed away the bulk of fabric and batting from the outside corners.


Trim the bulk of fabric and batting away from the outside corners


Turned right side out and poked out all the plate points.


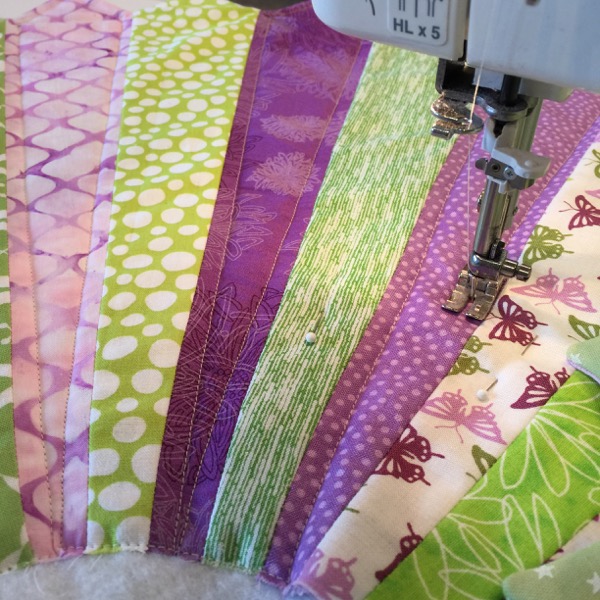
I pressed it, pinned it and starting in the centre did continuous 1/4" from seams quilting on all blades. Sewing every other blade the first time round and finishing the missed ones the next time around.


For the centre I made a patchwork of 1.5" squares

I traced the circle onto the patchwork with heat erase pen and stitched around on the line for pressing my seam allowance.

Pinned in place

I started with the 4 to make sure it was centred and added a few more after.

blanket stitched with some yellow decorative thread

One more project done and checked off my party prep list!!!