Monday, February 20, 2017

Let's S.E.W. link up and Big Quilt Bee Blocks

Sorry for the delay on putting up this months Let's S.E.W. link up party....
I have been so busy and it just totally slipped my mind...bad excuse, I know.....
And today is Family Day here in Canada...technically a holiday Monday....but I figured I better get this post up before it slips my mind again, lol! I'll leave the link up open till March 6th at midnight EST. to make up for the lateness of this month. 

Just a quick reminder that our link ups are joined with the Big Quilt Bee happening to make 
1000 quilts 
for Ronald McDonald Houses across Canada. All the information links can be found in the 
#BigQuiltBee tab at the top of this home page.

I have partnered with Rita at Fabric Please to help share the information with you all and hopefully inspire you to join in and help us reach that 1000 quilt goal!!

Which reminds me....Fabric Please is celebrating its 2nd Birthday and Rita is offering 
Free Shipping in Canada and the USA on 
FEBRRUARY 21st
She is also adding in a special surprise to every order
USE CODE 
SHIPFREE

I've been slowly working on getting 12 blocks done here in my UpStairsHobbyRoom and keep sharing my progress with you during these monthly link up posts....2 more to go!!! 

This month Fabric Please is sponsoring another $25 Gift Certificate for her shop, for one of you who link up your BigQuiltBee blocks!! Good luck everyone!


I just finished the above blocks and I'm still working on my last 2 red blocks to finish this small sized quilt, 3x4 blocks.
I'll just need to figure out what fabric to use on the back and the binding and this cute quilt will be ready to mail off to one of the designated quilt collectors!!


How about you?
Have you got any blocks made.....or working on a full quilt in one of the 2 sizes asked for?

Can't wait to see what you have been making......


Have a great week everyone!

Our Winner for the Month
Laura M.


Saturday, February 4, 2017

PJ Bottoms Sewing Tutorial

I can't believe I am posting a sewing tutorial that involves sewing clothing....
I am not much of a seamstress (lol, who am I kidding....I'm not a seamstress at all), so if I can do this,  I know you can too!!!

Over Christmas I was recovering from a flu bug and got it in my head
that I needed flannel Pj bottoms.
Now, I know I wasn't in my right mind, because if I was I would have reminded myself of all the failed clothing attempts I have had. So it's a good thing I wasn't thinking clearly
 and just Googled anyway, lol!

What I found gave me the start I needed, but I didn't quite agree with everything I read, so I tweaked and the results......
A very shocked quilter, me,  who not only created a pattern, but a pattern that worked!
And Pj bottoms that fit and look great....


So what did I do to celebrate....besides wearing them right away....and all the time...
don't judge me, lol
I found a baby pattern online and made a pair for Ava for Christmas....👍🏻
Technically, two pairs, because the first pair was way to big....so I tweaked that pattern too, using a pair of Ava's pants.


This went so well I thought I had better make another pair! And that went so well, again,  I figured I better write up a tutorial to share.... and honestly when it's been awhile between making a project, I'll come back to my own tutorials for a refresher.....so this is for my benefit too. 😉


Then, I reached out to some of my blog sponsors... to help you out with a sale, incase you want to try this tutorial for yourself....
and


And


both came on board to help sponsor this project tutorial.

Here in Canada it gets pretty cold over the winters and flannel is just the thing to keep you toasty warm, but some may not want such a warm fabric.....so this tutorial is done using a brushed cotton, a   lighter weight fabric, still with that soft feel,  it's a great option for mid-winter into spring alternative and for those of you who maybe warmer blooded than I am .....
You could also use cotton for a great summer version.


Pj Bottom Tutorial 


Tips:
  • There is a long running debate in quilting about pre-washing your fabrics or not....there is no debate when you are sewing cloths.....PRE-WASH your fabrics!!!! and dryer them! You do not want to go to all the trouble of making a pair of pants that shrink after you wash them....even if you are like me and hang your cloths to dry, PRE-WASH and dry.
  • Press the fabric after pre-washing and drying to have a flat surface to lay your pattern on and cut accurately.
  • Choose a pair of pants that you love and are comfortable in to make your pattern from. I wanted a loose Pj bottom so I used a pair of jeans that were a size or so too big, but that I still love wearing. (it doesn't have to be jeans)
  • Trace carefully. Make sure you line up the seams and have the pants hand pressed out flat so you are tracing an accurate size.
  • I used an end roll of newsprint that I got from a local newpaper to trace my pattern out on. Some craft stores now sell rolls of paper too. I like the newsprint paper because it is a bit thinner than regular paper. You can also buy pattern paper at some sewing centres. 
  • The amount of fabric you will need will depend on two things. You leg pattern length and the width of the fabric you buy. I used about 3 yds. I'm 5" 10" and laid my pattern pieces end to end, because my fabric was not wide enough to have them side by side.
  • If you own a serger you will serge all your seams, sewing and finishing your seams in one step, but if you don't you will want to finish your seams with either a zigzag stitch or I rolled each side of the seam allowance under and topstitched to completely encase, and add a stitch feature to all the seams. (*You'll see more in the tutorial pics)
  • You will want to backstitch at the beginning and ending of all your seams.
  • (EDIT) I sewed my seams at 3/8" not 1/2"....I wanted to make sure I had a comfortably loose pant and I figured I would err on a little bigger than not loose enough.
  • Abbreviations: RST- right sides together


Supplies:
Pair of pants to make your pattern
Pattern Paper
Pencil
Pins
Scissors (paper and fabric)
Ruler
Fabric (brushed cotton, flannel or even cotton)
3/4" waist band elastic (non rolling kind)
safety pin
And of course your sewing machine and thread

Making you Pattern:
You are going to want to fold your pants to make a back pattern, like the picture below. Lining up your seams and smoothing the pants flat to get an accurate template to trace. 


Then fold your pants as below and repeat to get your front pattern. Just tuck that back piece down when you get to the waistband section if your pants do this too.

 This is what my roll of newsprint looks like:


Once you have traced both front and back pattern pieces, and labeled them front and back,  take your ruler and add 1/2" for your side/crotch seams and 1.5" for the waistband casing and about an 1" for your hem.  Using your paper scissors cut out your two pattern pieces.


Making Your Pj Pants:
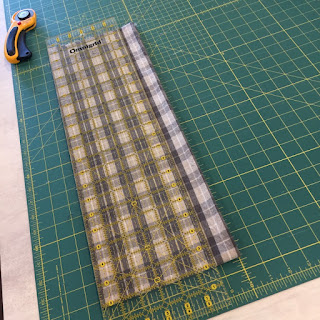
Lay your pattern pieces out on the pre-washed and pressed fabric, that is fold in half, staying as close to the selvage edge as you can. (That extra piece of brushed cotton on the fold side can be made into a narrower version an infinity scarf, tutorial found here, so practically no wasted fabric at all!!)
Pin in place and cut out your front and back pieces, with your fabric scissors. (you will now how 2 fronts and 2 backs)


I took two bright post-it notes and pinned them to my 2 front pattern pieces, so I wouldn't lose track of which piece was which. You can use a disappearing marking pen and write on the back of the pieces, if you prefer.


Sewing Steps:

  1. Lay a front and back RST and stitch the inner leg seam from hem to crotch (EDIT: as the tips said, I used a 3/8" seam). Repeat with the other front and back pieces. Press your seams open and finish the seam allowance as you wish.


  2. *Here is my seam allowance finish....takes more time and the last seam when the pants are together takes a little finesse, but so worth it for the finished look. (for me anyway)                            Roll the seam back and under and then topstitch close to the folded edge. Do this for both sides.


  3. Lay your two pieces RST matching the fronts and backs and lining up the inner leg seams. Pin in place and sew your crotch seam. Press your seams open and finish the seams.
  4. With RST front to back, match the outer leg side seams and waist.  Pin and sew outside leg seam. Finish the seams. This is the one that is tricky if you are rolling your seams, but it is totally doable. I've made  3 adult and a few infant sizes and I have finished all the seams this way.


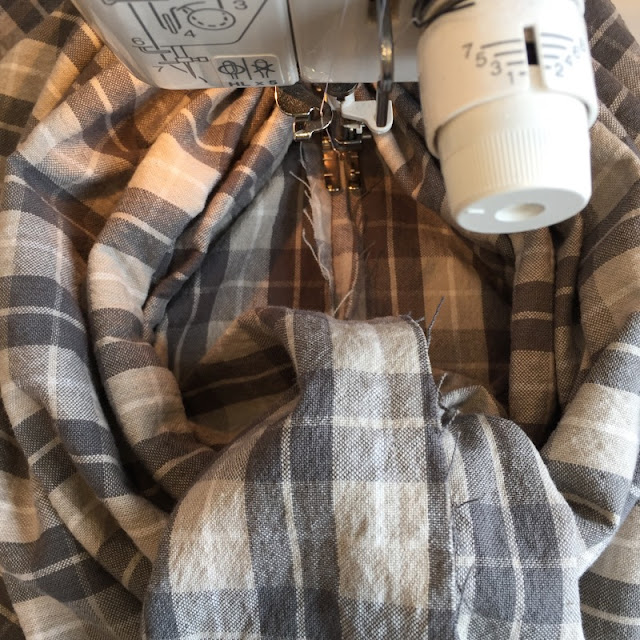
     *You will start at the waist band in the most open area of your pants, and work your way into the leg. Just take your time flattening out the fabric as it bunches up. Sew in small sections, this is a good time to have needle down in play on your machine if you have it.

  5. Making the Waist Band: Press under 1/4-3/8" all around the top edge of your pants, and then turn it down 1". Pin in place and topstitch close to folded edge leaving a 2" opening for threading the elastic into your pants. This is also a perfect time to add a label, if you own your own, or just a ribbon if you don't, to mark the back of your pants....so you don't try putting them on backwards all the time, lol!!


  6. Now take your 3/4" elastic and measure it around your waist to get a rough length of what you need, and cut. Using a safety pin thread your elastic through the waist band casing you just created. When you have threaded it through check that you haven't twisted the elastic and pin the two ends of the elastic together to hold in place, watching that it doesn't disappear into the opening. Try on your pants to get the accurate length of elastic you need.  Re-pin and then stitch a box into the two pieces backstitching to make it strong and trim extra elastic away. Allow the elastic to disappear into the opening now and topstitch close.


  7. Hem: Try your pants on again to check for length, you shouldn't have a too much extra. I do a simple 1/4" fold and fold again.....but you can finish however you need to, to get the right length. 


    That's it....
    You have successfully completed your Pj Bottoms......
    I hope you love yours  as much as I love mine...
    Can't wait to see what you make.
    Use #pjbottomstutorial and tag me in @upstairshobbyroom on IG

    Oh and remember that extra strip of fabric I said you could make an infinity scarf.....
    Well I cleaned up the ends and trimmed the length straight and ended up with an approx. 15" wide by a little over 72" piece for my scarf....infinity scarf tutorial here


    is offering 10% off all Woven fabrics
    Saturday Feb 4 - Wednesday Feb 8th


    Is offering a 15% off coupon code on Flannel
     Feb 4 - 11


Wednesday, February 1, 2017

It's My day on the I Love Precut Quilts Blog Hop

I think this is my 3rd book review blog hop
and I have enjoyed everyone of them!

There is something so exciting and fun about being one of the first people to see a new quilting book. To know that another like minded creator has poured time, energy and love into turning their design inspirations into a project(s) for us to make and enjoy too, is just exciting to me!


This is Trish's 3rd book and her first in the modern quilting genre!
You can read more about Trish over on her blog, Quilt With A View

I don't know about your, but when I first look at a quilt book, I skim through the pictures to see what catches my eye.....
Would I want to make a project or two or more....because that's the most important reason to buy a new book...then I look to see if the instructions are clear and simple, with enough illustrations for this very visual learner.....
Trish's book checked off all of my list....

I was intrigued by this book's title too...I have over the years, as I am sure a lot of you have, accumulated a number of precuts in all the different forms....mostly charm packs, because they are a great and affordable way to buy every design in a new fabric line that I've just fell in love with. 
But, then I end up hoarding them...so I had quite a stack to choose from....
And you know me,  I just had to take the opportunity to use some and try out one of Trish's patterns to show you on this blog hop.....

It took me a few minutes to narrow my list down to just one.....which when I think back, I probably spent almost as much time deciding on which project and which charms, as it took to sew the whole quilt top!!
To say this quit top came together quickly is not exaggerated.....
and don't we all need to have a few patterns in our back pocket to bring out 
when we are in a time crunch situation!! Well this is one of them.

But don't think you have to have precuts to buy this book....
You can use your yardage too, and just cut to size...may take a few minutes longer, but no ones counting!

This was my charm pack choice: so sweet and cute...
perfect for a Nana floor quilt for my new grand baby, Ava!!

You remember how I said you don't have to use precuts if you don't want to.....
a lovely online friend(Lorraine), sent me this bundle of loveliness to make a floor quilt for Ava...
And being as we only have hardwood floors, doubling up the floor quilt will be happening....so this is going to become another I love Precut Quilts...with yardage, 😉 


After washing....doesn't it just have an antique quilt feel to it!!!


And here's the second quilt made with 14 FQ and yardage.....so technically I did use a precut, just not the one the pattern called for, lol.... but you'll forgive me when you see how totally adorable this version turned out!!!


Ginger Hearts digital pantograph


.....and there is nothing better than a quilt with a baby on it....especially when that sweet baby is my first grandchild!!! My heart is full.


She loves it Lorraine she is so drawn to the bright colours!!!


That's just the first quilt in this book of 16 fast and fun projects!!!

The next one I might try......

Paper Lanters

or

Ups and Downs

Which ever I choose I know this book will be brought out again and again!!!

AND 
Just a reminder.... As a bonus, I reached out to my blog sponsors.....

 Discounts on PreCuts if you need or want to add to your stash!!!

From Jan. 30-Feb 6th Save:


 to save 15% on your precut order


Use Discount Code
"20PLEASE"
to save 20% on your precut order

Now it's your chance to have a copy of your own.....

Remember this giveaway is open to everyone, and based out of the US.
International winners will receive an electronic copy of the book.

Here is the Schedule again so you can continue on your 
I Love Precut Quilts Blog Hop Journey

MONDAY, JAN 30 

C&T Publishing (Tricia will be the guest blogger on C&T's blog to kick off the Blog Hop) 

TUESDAY, JAN 31

Mark Lipinski
Julie Cefalu from The Crafty Quilter 
Bea Lee from Beaquilter

WEDNESDAY, FEB 1 

 Sandy Whitelaw (You are Here)
Camelot Fabrics
Cheryl Parker from Cheryl's Teapots2Quilting


THURSDAY, FEB 2

Joy Lamphere from Am I Shouting Yet?
Bernie Kringel from Needle and Foot

Generation Q Magazine

FRIDAY, FEB 3

Tricia Maloney from Quilt With a View 


a Rafflecopter giveaway


SaveSave
SaveSave