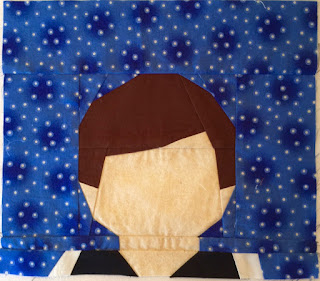
Not to worry, no tickling involved in this test, ;) But I did get the opportunity to test a new paper pieced pattern by Kristy at Quiet Play. I love testing her patterns, and I've tested a few....

and lately the Geometric Series....these are fantastic....so many options
And the Feather Test and Review
Release of the pattern is set for beginning of November
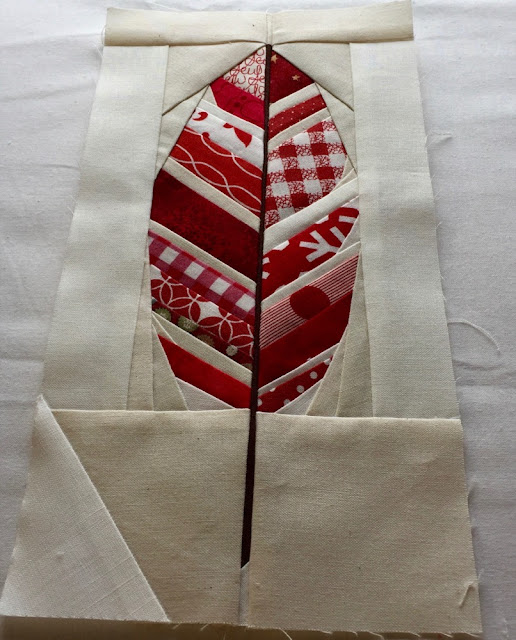
This one has a lot of seams, and sewing the quill in the centre was definitely the trickiest part, but totally doable. Take your time press and use lots of pins on the second joining seam. (pictures below)
Also just watch the length of your pieces and the angles. I don't know about you but I always have more trouble with one angle flip then the other, so I lay the piece on that I am checking and flip it over, mimicking a 1/4" seam to see if my fabric piece is long enough, and placement is right, to cover the angled area needed. If you aren't sure about where the placement is for the reverse side, I hold my piece of fabric with 2 fingers on each end, one finger on the fabric side and one finger on the back where the pattern is printed to make sure it extends passed the sewing line enough on each side.
Another thing to watch as you are joining the last section, the bottom background seam, I was so intent on matching top and bottom an sewing in the quill section straight that I forgot about that seam. You'll want to pin there. (red feather was pinned the other two....before I realized...they are both a little off)
The Feather is a very versatile pattern too, you don't have to sew on every sew line if you don't want, and because of the design it actually could be used as a leaf pattern too. It looks great with solids and prints, and a fantastic way to use up some of your scrap bits, so far that is all I've used.
The pattern sections are coloured in such a way to make it easy to use an assortment of colours/fabrics or to add your background colour in every other piece for a more open looking design.
My Tips
I found if you iron press to set the bulky seam and flip it back towards you
and press, it puts the seam allowance out of the way for joining the next section.
But just to be sure, I pin the 3 areas I want to have line up, catching just some of the seam allowance area and making sure the end of the pin comes up and is over top of the seam allowance of the other seam. The pin holds the seam out of the way.

I then add more pins to keep everything aligned as I sewed the last seam.
I also found that if you sewed the seam with the feather side up and the seam side down, it went a lot smoother.
That's it! I hope you will all drop over to Kristy's blog and check out all her fantastic paper pieced patterns and try this one too when she adds it beginning of November!!
Oops...one more thing..... I added an extra piece to my yellow feather centre, to have feather at the top. Easy, peasy, just draw an extra angled line, and add some of your feather fabric!!
With them all lined up you can see they all are a bit different from each other. The yellow I omitted adding any background between colours and skipped those sewing line, giving me larger yellow section. The orange I believe I sewed every line with the background added. The red was a combination, added background, missed some lines and some background pieces. (I also made a fabric mistake that I fixed by adding an extra section that is not in the pattern. How do I make that work? I'll make that same "mistake" a few times, then only you and I will know it wasn't done on purpose!! ;)
This is going to make an amazing table runner!!
But for now back to my One Block Wonder prep!!


This would be a super wall hanging, all lovely, different, and unless you told us, no-one would know you added extra in one feather.
ReplyDeleteThe feathers are great. They would make a great border or a filler block. I love the pig you've shown. I have to have that pattern so I'm off to Kristy's blog. I love pigs xx
ReplyDeleteWow......great feathers and love all the other blocks as well.
ReplyDeleteWhat beautiful blocks and incredible piecing! They say they are feathers.... But they remind me of the fall leaves and look like trees decked out in all their pretty coloured leaves. Thanks for showing us your tips, Sandy!
ReplyDeleteWhat gorgeous feathers!
ReplyDeleteI love seeing these paper piecing patterns in the different colors, thanks for sharing!
ReplyDeleteThanks so much for testing for me once again Sandy - you do such a great job! Great to share tips on piecing it too! One tester suggested using a zipper foot for adding the stem of the feather too!
ReplyDelete